Science project
Microwave Candy: Do Some Colors of M&Ms Melt Faster than Others?

Have you ever wanted to microwave candy? If you’ve ever stood in the sun wearing a black shirt, you should know that darker colors absorb light better. But will certain colors absorb microwave radiation better than others? In this cool candy science fair project, we’ll find out by placing different colors of M&Ms in the microwave. Which ones get hot and crack first?
Problem:
Do certain colors of M&Ms absorb more microwave radiation than others? Do some colors of M&M's melt faster than others?
Materials:
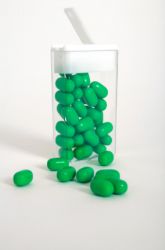
- A package of M&Ms (If possible, get a package of coconut M&Ms. This package will have three colors: green, brown, and white. If this isn’t possible, get the good old traditional M&Ms with five colors: yellow, red, blue, green, and orange.).
- Microwave
- Jar lid
- Pencil
- Paper plate
- Glue
- Ruler
Procedure
- Get your flat, microwaveable plate. The plate needs to be paper, not plastic, since some plastics might heat in the microwave. Why do you think we want to avoid picking a plate that heats up in the microwave?
- Measure the distance to the center of the circle, and make a dot in the middle. Center the jar lid over the dot and trace the lid with a pencil to create a circle.
- Take your M&Ms out of the package, and pick only the candies that aren’t cracked or oddly shaped for your experiment. Why do you think it’s important that we pick normally shaped candies?
- Time to get your candies in position! Make three or five clusters (depending on the type of M&Ms you are using) of three candies each, placed at equally spaced points around the circle. Refer to the illustration below:

- Make sure that the clusters of M&Ms are equally far away from each other. Then, use a dot of glue to attach each candy to the plate.
- While waiting for your glue to dry, create a hypothesis, your best guess about what is going to happen. When you cook these candies in the microwave, which colors do you think will get hot and crack first? Why?
- Place the plate in the microwave. Different microwaves take different amounts of time to do this step, so if your microwave is not very strong, this can take quite a few tries. Heat the candies for 30 seconds, then remove them from the microwave and observe them. Are there any cracks? Record the number of cracks and any other observations in a table like the one below:
|
Color of Candy |
Number of Cracked Candies |
||||||
|
0 Sec |
30 Sec |
60 Sec |
90 Sec |
120 Sec |
150 Sec |
180 Sec |
|
|
White |
0 |
||||||
|
Observations |
|||||||
|
Green |
0 |
||||||
|
Observations |
|||||||
|
Brown |
0 |
||||||
|
Observations |
|||||||
- Heat your candies again for another 30 seconds, and observe them again. Continue to repeat this step until one of the candies cracks. What was the color of the first candy to crack? Make sure you record any changes after each 30 second cooking period.
- Do this experiment several times with new sets of M&Ms placed in the same position on fresh plates. Why do you think we want to repeat the experiment more than once?
Results
Results will vary.
Why?
If you’ve ever put a plastic container of food in the microwave before, you’ve probably noticed that the food gets a lot hotter than the container does. So how come? Water molecules in the food are more polar than the molecules in the plastic container, which means they have a positive and negative pole like a magnet does. Polar molecules absorb microwave radiation very well!
If certain colors of M&Ms cracked first, it’s not because those colors are better or worse at absorbing microwaves. Different colors can certainly absorb different amounts of light, and while microwaves are a lot like visible light, they have a much shorter wavelength and are impossible to see. An object’s ability to absorb microwave radiation has pretty much nothing to do with its color! So what’s going on?
The chocolate in the center of an M&M candy more polar than its hard candy shell, so it absorbs microwaves and melts. The heat from the chocolate eventually weakens the candy shell, causing it to crack. If you noticed that certain colors of M&M’s cracked sooner than others did, it may be because the food coloring used in those colors created a weaker candy shell.
Now let’s think back to the procedure. Remember when we asked you to make sure to pick regularly shaped M&Ms? This way, we can make sure that the candy shell surrounding the chocolate isn’t weaker on some M&Ms than it is on others (for reasons other than color, that is!). We also picked a paper plate for a similar reason: we don’t want any source of heat besides that created by microwaves melting the M&Ms. Remember—the variable we’re trying to test is if microwave radiation works better on certain types of colors, so we need to make sure nothing else can mess up the results of our experiment!
Do you think you can redesign this experiment to test how differently-colored M&Ms melt when they’re exposed to light? Maybe you can design an experiment that determines if foods with more water content heat up better in the microwave. Whatever you do, make sure you get an adult’s help, and test only one thing at a time!
Education.com provides the Science Fair Project Ideas for informational purposes only. Education.com does not make any guarantee or representation regarding the Science Fair Project Ideas and is not responsible or liable for any loss or damage, directly or indirectly, caused by your use of such information. By accessing the Science Fair Project Ideas, you waive and renounce any claims against Education.com that arise thereof. In addition, your access to Education.com's website and Science Fair Project Ideas is covered by Education.com's Privacy Policy and site Terms of Use, which include limitations on Education.com's liability.
Warning is hereby given that not all Project Ideas are appropriate for all individuals or in all circumstances. Implementation of any Science Project Idea should be undertaken only in appropriate settings and with appropriate parental or other supervision. Reading and following the safety precautions of all materials used in a project is the sole responsibility of each individual. For further information, consult your state's handbook of Science Safety.
Related learning resources