Science project
Why Does Honey Crystallize?
Has your sweet treat turned tough all of a sudden? If you’ve ever struggled to get honey out of a jar, you’ll know that this treat is sometimes a liquid and sometimes a solid. In this experiment, you’ll explore the properties of honey to answer the question: Why does honey crystallize?
Problem:
What makes honey crystallize? What factors change the speed at which honey crystallizes?
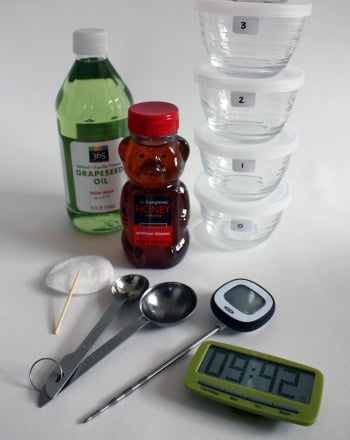
Materials:
- 5 small, identical food jars with lids
- Masking tape to act as labels
- Cotton ball
- Popsicle stick
- Honey (If possible, get natural honey that’s from a local farm. Some honey is mixed with other substances, and this could change the results of your experiment)
- Measuring spoons
- Canola oil
- Water
- Freezer
- Timer
- Toothpick
- Digital thermometer
Procedure
- Add a small amount of cold water to each container. Container #1 gets one teaspoon of water, container #2 gets 2 teaspoons, container #3 has 3 teaspoons, and container #4 has 4 teaspoons. The fifth container will have only honey.

- Add 1 tablespoon of honey to each of the containers. This is the tricky part, since honey doesn’t like to flow easily off a spoon! Oil your spoon using the cotton ball by dipping the ball in the oil and spreading it lightly over the spoon. Next, fill the spoon with honey. Finally, push the honey off the spoon into the container. Use the Popsicle stick if you need to scrape it off the spoon so that you don’t feel tempted to eat the experiment!
- Use the popsicle stick to gently mix the honey and the water together in each jar.
- Create a hypothesis, your best guess about what is going to happen. When you put your containers in the freezer, which one do you think will crystallize the fastest? Why?
- Create a chart to track your findings. The chart will have five rows. On the left side of each row, place the jar numbers. Begin with jar 1 at the top and go down to jar 5 at the bottom. On the top of the chart, place times. The first time is 2 minutes, the second is 4 minutes, and so on. You will place an X under the time when you first see crystals forming. On the side of the chart, create an area for notes. This is where you will note the temperature at which each jar of honey started to crystallize.
|
|
2 min |
4 min |
6 min |
8 min |
10 min |
12 min |
14 min |
|
Jar 1 |
|
|
|
|
|
|
|
|
Jar 2 |
|
|
|
|
|
|
|
|
Jar 3 |
|
|
|
|
|
|
|
|
Jar 4 |
|
|
|
|
|
|
|
|
Jar 5 |
|
|
|
|
|
|
|
- Put all of the jars into the freezer, and set a timer. After 2 minutes, look at the jars and check them for signs of crystallization. The honey may look rough or cloudy. Watch the jars but try not to handle them, since the heat from your hands could change the way the honey crystallizes.
- Continue to look at the jars every 2 minutes. If you see crystals forming, place the thermometer into the honey and record the temperature on your chart.
Results
The honey without water will crystallize first.
Why?
When we think of crystals, we usually think of precious jewels—but the truth is that many things crystallize. In fact, salt and sugar are both crystals.
When you stir salt into water, it looks like it disappears—but in reality, it’s still there; it’s just dissolved into the water. Let that water dry out, and salt crystals will be left behind. Like salty water, honey is a solution, which means that bits of sugar are spread throughout a liquid. When honey crystallizes, the honey molecules spread throughout the liquid come together to form solid crystals, and the more dissolved bits of a solute there are in a solution, the faster that solution will crystallize as it cools down. Mixing more water into a solution makes it crystallize more slowly.
Heat also changes how quickly crystals form. Every solution has a temperature at which the solid is spread throughout the liquid. For honey, this is around room temperature.
Honey is made up of a lot more than just sugar and water! Raw honey contains many different nutrients and may even contain bits of pollen. Some honey comes the nectar bees gather from specific flowers, such as clover, while other honey is a mixture of different nectar sources. Try this experiment again, using honey from the nectar of different flowers. Do the flowers make a difference when it comes to honey crystallization? Why? Do some flowers have sweeter nectar than others?
Education.com provides the Science Fair Project Ideas for informational purposes only. Education.com does not make any guarantee or representation regarding the Science Fair Project Ideas and is not responsible or liable for any loss or damage, directly or indirectly, caused by your use of such information. By accessing the Science Fair Project Ideas, you waive and renounce any claims against Education.com that arise thereof. In addition, your access to Education.com's website and Science Fair Project Ideas is covered by Education.com's Privacy Policy and site Terms of Use, which include limitations on Education.com's liability.
Warning is hereby given that not all Project Ideas are appropriate for all individuals or in all circumstances. Implementation of any Science Project Idea should be undertaken only in appropriate settings and with appropriate parental or other supervision. Reading and following the safety precautions of all materials used in a project is the sole responsibility of each individual. For further information, consult your state's handbook of Science Safety.
Related learning resources