Science project
Microscopic Life is Everywhere

Difficulty
Medium
Cost
Minimal (if a microscope is available)
Safety Issues
None
Material Availability
Common
Approximate Time
1 week
Objective
Microscopic life exists almost everywhere, even where it doesn’t seem to exist. A handful of dry, dead grass is to be put into water and left alone for a period of time. Samples are then taken and made into wet slides. A microscope is used to explore that partial drop of water.
The student will also learn a number of things:
- How to make a wet slide
- How to use a microscope
- Identify various kinds of microscopic life, both plant and animal
Materials
- Glass cup, jar, beaker
- Water
- Handful of grass, etc.
- Eyedropper
- Materials for making a wet slide
- Microscope
Background Information
Most life forms cannot be seen by the naked eye, and exist almost everywhere. Sometimes it is obvious that life forms exist even if they can’t be seen. A stagnant pond is a good example of this. However, life exists in “dead” grass, soil and elsewhere.
The goal of this project is to explore what normally can’t be seen, and the characteristics of this micro-world.

Terms
- Protozoa: any of the single-celled or multi-celled life forms, usually animal
- Ciliate: a microscopic life form that uses tiny “hairs” to move, or to bring in food
- Amoeba: a single-celled animal with no given shape
- Cell: the smallest unit of life
Concepts
Life exists almost everywhere, even when it is invisible. Most forms depend on water in one way or another.
Research Questions
- What is life?
- What are the differences between plant and animal?
- Name some of the one-celled animals.
- Name some of the multi-celled protozoa.
Experimental Procedure
- Gather the necessary materials.
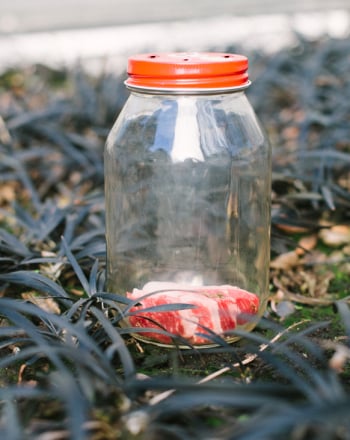
- Collect a small amount of grass. (If green grass, include a small amount of soil.)
- Place grass into a small beaker or other glass container.
- Pour in enough water to cover completely.
- Allow to sit for at least one week.
- With an eyedropper held near plant matter, get a sample.
- Make a wet slide.
- View under the microscope.
Bibliography
- http://www.mos.org/sln/sem/mic_life.html
- http://news.nationalgeographic.com/news/2009/11/photogalleries/best-tiny-microscopic-life-pictures/
- http://www.micrographia.com/specbiol/rotife/homebdel/bdel0100.htm
- http://www.microscopy-uk.org.uk/mag/indexmag.html?http://www.microscopy-uk.org.uk/mag/wimsmall/rotidr.html
- http://www.microscopy-uk.org.uk/mag/indexmag.html?http://www.microscopy-uk.org.uk/mag/artsep01/amoeba.html
- http://www.scienceclarified.com/Al-As/Amoeba.html
- http://101science.com/paramecium.htm
Note From Authors to Editors
There are many ways to do this. A common way is to skim samples from a pond (the more stagnant, the better). Even children aren’t surprised at finding microscopic life in that. They are amazed, however, when a handful of what seems to be dead, dry grass is put into a glass of water, and after a few days, put under the microscope.
Education.com provides the Science Fair Project Ideas for informational purposes only. Education.com does not make any guarantee or representation regarding the Science Fair Project Ideas and is not responsible or liable for any loss or damage, directly or indirectly, caused by your use of such information. By accessing the Science Fair Project Ideas, you waive and renounce any claims against Education.com that arise thereof. In addition, your access to Education.com's website and Science Fair Project Ideas is covered by Education.com's Privacy Policy and site Terms of Use, which include limitations on Education.com's liability.
Warning is hereby given that not all Project Ideas are appropriate for all individuals or in all circumstances. Implementation of any Science Project Idea should be undertaken only in appropriate settings and with appropriate parental or other supervision. Reading and following the safety precautions of all materials used in a project is the sole responsibility of each individual. For further information, consult your state's handbook of Science Safety.
Related learning resources