Science project
Inverse Square Law: How Does Distance Affect the Spreading of Light?
You’re sitting under a tree on a sunny day. There are bright circles of light of light from the sun making chaotic patterns on the grass. Where do you suppose they come from?
Problem
How does distance affect the spreading of light, and why?
Materials
- A sunny day
- Helper
- Tape
- Tape measure
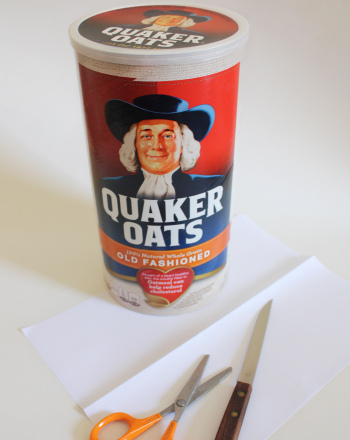
- Something to cut holes with (scissors, hole punch, sharp pen, key)
- Various perforated objects (forks, whisks, spiral Binding, screen Mesh, steel wool)
- Sheet of ¼ in. graph paper
- Pencil or pen
- Construction paper
- Cardboard box that’s big enough to sit in
Procedure
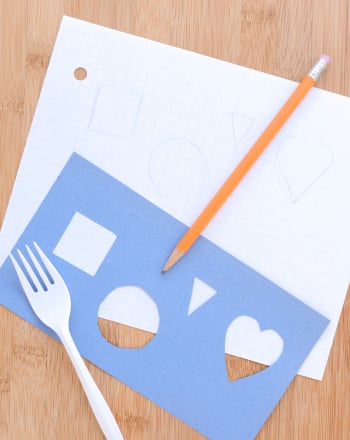
- Cut a few shapes out of the construction paper (you can pinch the paper to get at the middle with scissors)—a box, a circle, a star, or whatever you like. Make sure the shapes are small: about ½ inch wide at the largest. Each shape should be at least two or three inches apart.
- Go outside with your helper and all your items, and ask them to hold up the construction paper about half a foot over the sidewalk so that the sun passes through the holes. What do you see? Is it what you expected to see?
- Now, place the graph paper on the ground where the shadow is, and sketch the outline of each shape.
- Have your helper raise the paper a little bit (a foot or so) so that the spots of light stay in the same position. What happens to the shapes?
- On your graph paper, sketch the outlines of the new shapes around the outlines of the old shapes. What do you think the shapes will look like when your helper moves the sheet higher?
- Have your helper raise the paper another foot two more times. Draw the shapes made by the sunlight each time.
- Once you finish, move the paper back and take something small, like a fork or your pencil, and move it across the shapes above the construction paper. Watch the light cast on the graph paper. Try it at a few different heights. Do you see anything strange?
- Take your other objects and move them like the construction paper. Try overlapping them at different heights. What do you think is happening to the light?
- Your fingers will do this too. Hold your thumb about an inch away from your eye, and look at something far away. Move your thumb back and forth over something in your view, while you’re looking in its direction. With some practice you should see the light bend. Try it with your thumb farther away from your eye as well.
Extra: If your cardboard box is big enough you can try to make what a camera obscura—one of the oldest forms of generating an image. Poke a hole in the side of the box, and sit inside with the hole facing a very bright source of light, such as a backyard on a sunny day. Put some white paper up on wall opposite the hole so that you have a screen for your image to be projected onto. You should see an upside-down image of your backyard!
Results
When the construction paper is close to the graph paper, the shapes will show up clearly. As you move the construction paper away, the shapes look more and more like circles until you can’t tell the difference between them. If you move something in front of the paper the shadow it casts will be distorted as if it were moving through a lens. The blob of light on the graph paper is actually a projected image of the sun—all the cutout shapes cast images of the sun when they’re far enough away from the ground. The objects will make intricate patterns of light and dark when you move them across each other.
Why?
When light encounters the edge of something it will bend around that edge, much like ripples of water hitting a pier. This is known as diffraction. When the obstruction (our paper) is close to the focal plane—or where the shadow is being cast—the light doesn’t have much of a chance to bend, and the shadow looks much like the shape in the paper. When the paper is farther away, the light has more time to bend, and the shape starts to change more into an image of what is behind the paper (in this case, the sun). The reason that all the shapes look the same when they’re far away from the ground is because the bending of the light smears out all the angles and lines of the shapes.
So why did your shapes start to look dimmer as they became bigger? Distance affects the spreading of light according to the inverse square law of light. This law basically states that as the source of light gets farther away from any surface the light is projected onto, the intensity of light per square centimeter decreases. Remember, only so many rays of light can make it through each hole you cut into your construction paper. When these rays get spread out, the image gets bigger, but won’t be as bright!
Education.com provides the Science Fair Project Ideas for informational purposes only. Education.com does not make any guarantee or representation regarding the Science Fair Project Ideas and is not responsible or liable for any loss or damage, directly or indirectly, caused by your use of such information. By accessing the Science Fair Project Ideas, you waive and renounce any claims against Education.com that arise thereof. In addition, your access to Education.com's website and Science Fair Project Ideas is covered by Education.com's Privacy Policy and site Terms of Use, which include limitations on Education.com's liability.
Warning is hereby given that not all Project Ideas are appropriate for all individuals or in all circumstances. Implementation of any Science Project Idea should be undertaken only in appropriate settings and with appropriate parental or other supervision. Reading and following the safety precautions of all materials used in a project is the sole responsibility of each individual. For further information, consult your state's handbook of Science Safety.
Related learning resources