Science project
Bacteria Science Fair Project: How Does Bleach Kill Bacteria?

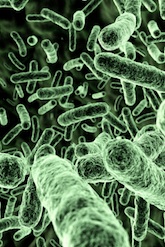
Bacteria are one celled organisms that are essential for all life’s survival, but they also cause many diseases, including strep throat, cholera, many types of food poisoning, and the Black Plague, to name just a few. Luckily, humans have discovered several disinfectants, or chemicals that kill bacteria. Household bleach, a solution of sodium hypochlorite and water, is one such disinfectant. So how does bleach kill bacteria? It works by damaging bacteria’s proteins (not unlike the way heat makes the protein in egg white solid). Bleach, as you may know, stings human eyes and causes rashes, so it’s important for us to use just enough bleach to kill bacteria. In this bacteria science fair project, you can investigate what concentration of bleach is sufficient for killing bacteria. Please note that this experiment requires a sizeable investment in both equipment and materials. It would be ideal for you to borrow as many of the materials and equipment you can from a high school or college science lab (or a medical lab, if you have access). It would also be ideal to have the hands-on assistance of someone who has done microbiology experiments before.
Also, make sure you have a good understanding of the necessary precautions when working with live bacteria. The species of E. coli suggested is categorized as safe for high school classrooms, but you still need to clean your work area with 10% bleach solution both before and after the experiment. You should clean your hands and wear sterile gloves, and of course no one should eat anything in the area where you are working! The hard thing about doing this kind of experiment is that bacteria are everywhere, so in order to make sure you are doing a controlled investigation, you have to make sure that your initial materials are sterile, or treated and packaged so that they contain no microorganisms. When you are done with your experiment, make sure that all the bacteria on your plates are dead, either by bleach or autoclave. Also be sure to wear protective clothing and eyewear when working with bleach.
If you’re careful and follow the proper procedures, you will find that bacterial experiments are some of the most relevant and interesting you can do.
Problem
What is the weakest bleach solution that will kill bacteria?
Materials
- Sterilizer or autoclave (can be found in many high schools or community college science departments, as well as medical facilities)
- 7 screw-top culture tubes (16 x 125 mm)
- Test tube rack
- Fresh container of household bleach (note that bleach can damage clothing, hair and skin)
- Safety goggles
- Empty spray bottle
- Labels
- Permanent marker
- Sterile Water
- Sterile transfer pipettes
- Escherichia coli, Living, K-12 strain, tube
- Sterile inoculating loops
- 7 Nutrient agar, prepared media plates (store in refrigerator until ready to use)
- 7 Sterile cotton swabs
- Incubator (at many high school and community college science departments)
Procedure
- Sterilize the screw-cap culture tubes and water using the autoclave.
- Using the permanent marker and labels, make the following labels for your screw-cap culture tubes: 10% bleach, 1% bleach, .1% bleach, .01% bleach, .001% bleach, .0001% bleach, and 0% bleach.
- Make a 10% bleach solution for cleaning your work area. In the empty spray bottle, mix 90 mL water with 10 mL bleach.
- Clean your work area using the 10% bleach solution.
- Transfer 10 mL of the 10% bleach solution to the tube labeled 10% bleach.
- Using a sterile transfer pipette, move 9 mL of sterile water to the tube labeled 1% bleach.
- Add 1 mL of the 10% bleach solution to the 1% bleach container. Stir.
- Using a sterile transfer pipette, move 9 mL of sterile water to the tube labeled .1% bleach.
- Add 1 mL of the 1% bleach solution to the .1% bleach container. Stir.
- Using a sterile transfer pipette, move 9 mL of sterile water to the tube labeled .01% bleach.
- Add 1 mL of the .1% bleach solution to the .01% bleach container. Stir.
- Using a sterile transfer pipette, move 9 mL of sterile water to the tube labeled .001% bleach.
- Add 1 mL of the .01 % bleach solution to the .001% bleach container. Stir.
- Using a sterile transfer pipette, move 9 mL of sterile water to the tube labeled .0001% bleach.
- Add 1 mL of the .001 % bleach solution to the .0001% bleach container. Stir.
- In the last tube, put in 10 mL of sterilized water. What purpose does this tube serve?
- Using a new sterile inoculating loop each time, put .1 mL of E. coli culture into each of the seven containers. Shake well.
- Once you have put the bacteria in all the containers, let the seven tubes sit for ½ hour. Why?
- Using the permanent marker, label the bottom of each nutrient agar plate 10% bleach, 1% bleach, .1% bleach, .01% bleach, .001% bleach, .0001% bleach, and 0% bleach.
- Shake the tube of 10% bleach. Dip a sterile cotton swab in the liquid.
- Gently rub the swab over the agar in the 10% labeled petri dish. Make sure to cover the whole surface and be careful not to break the agar surface.
- Repeat the shaking, soaking, and rubbing over the agar for each of the other solutions.
- Clean your work area with the 10% bleach solution.
- Place the plates upside down (with the media in the upper dish, cover on the bottom) in the incubator for 24 hours at 100 F, 37 C. If you do not have an incubator, you can let the plates sit at a lower temperature, but the process will take longer.
- Make a hypothesis as to which bleach solution will be just strong enough to kill the bacteria. Explain your reasoning.
- Check your plates regularly for bacterial colonies. Colonies are little white dots that appear on the surface of the agar.
- Organize your results in a data table.
|
Bleach Concentration |
Number of E. coli colonies |
|
10% |
|
|
1% |
|
|
.1% |
|
|
.01% |
|
|
.001% |
|
|
0% |
|
If a plate has many colonies, you can estimate the number of colonies by counting only in one quarter of the plate and multiplying by 4.If the number of colonies is truly overwhelming, you can write TNTC–too numerous to count.
- Once you are done counting your colonies, soak the plates in 10% bleach solution before throwing in the trash. Why is it necessary to soak the plates in bleach first?
- Clean your work area with 10% bleach solution. Make sure to thoroughly wash your hands before eating.
Results
You are likely to find no colonies on the plates with 10% and 1% bleach solution. The lower concentrations of bleach are likely to have progressively more and more colonies. The plate with no bleach is likely to have a very high number of colonies.
Why?
The tube with water only served as your control: you need to see how many bacteria would grow without any bleach (if the control agar plate had no bacteria growing on it, you’d know that your experimental results were invalid). You waited a ½ hour after adding the bleach to each of the tubes to make sure that the bleach solution had time to work, as it takes time for the bleach to damage the bacteria’s proteins. The 10% and 1% bleach solutions contained enough bleach to kill all the bacteria.
You might be wondering why you were instructed use 10% solution to clean your area when your experiment demonstrated that a 1% solution would be sufficient. Unfortunately, many bleach solutions lose their effectiveness over time, so a stronger solution will kill 100% of bacteria longer. You might advocate for using fresh 1% bleach solution regularly.
Going Further
You might repeat this experiment using samples of 1% bleach solution that have sat for 0 days, one day, two days, three days, and four days to see how quickly bleach solutions lose their effectiveness.
Education.com provides the Science Fair Project Ideas for informational purposes only. Education.com does not make any guarantee or representation regarding the Science Fair Project Ideas and is not responsible or liable for any loss or damage, directly or indirectly, caused by your use of such information. By accessing the Science Fair Project Ideas, you waive and renounce any claims against Education.com that arise thereof. In addition, your access to Education.com's website and Science Fair Project Ideas is covered by Education.com's Privacy Policy and site Terms of Use, which include limitations on Education.com's liability.
Warning is hereby given that not all Project Ideas are appropriate for all individuals or in all circumstances. Implementation of any Science Project Idea should be undertaken only in appropriate settings and with appropriate parental or other supervision. Reading and following the safety precautions of all materials used in a project is the sole responsibility of each individual. For further information, consult your state's handbook of Science Safety.
Related learning resources